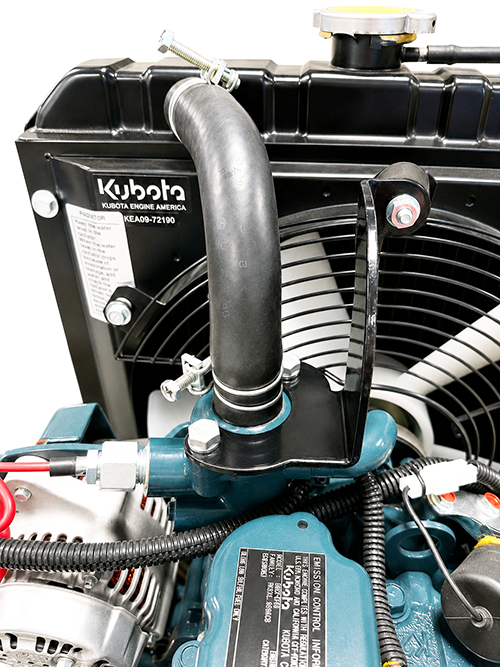
Radiator Stabilizer Bracket Installation
The radiator stabilizer bracket prevents the radiator from moving horizontally during operation.
Before You Begin
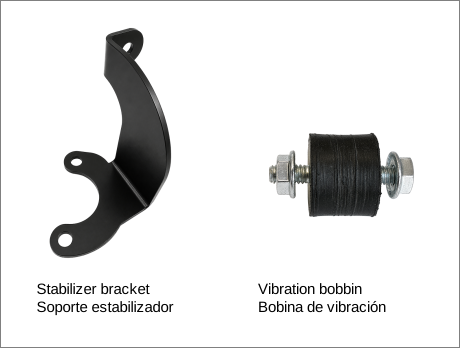
Have the radiator stabilizer bracket and vibration bobbin within reach before starting the procedure.
Items Required
Radiator stabilizer bracket
Vibration bobbin
Tools Required
10 mm wrench
11 mm (or 7/16 in) wrench
13 mm (or 1/2 in) wrench
Clean rag
Install the Bracket
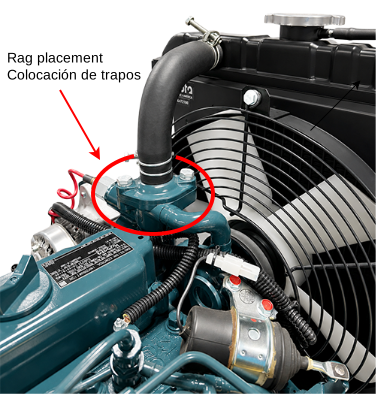
Wrap a clean rag around the location on the engine identified in the image below.
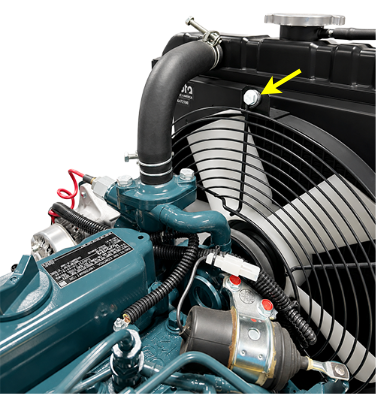
Use a 10mm wrench to remove the bolt on the radiator fan housing.
While pressing down firmly on the flange to prevent coolant from leaking out, use a 13 mm wrench to remove the two bolts on the engine. Set the bolts aside for reinstallation in the next step.
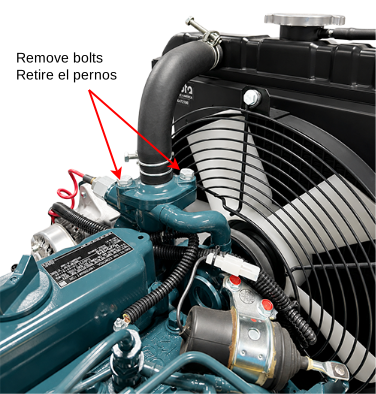
Place the stabilizer bracket onto the engine mount holes and reinstall the bolts.
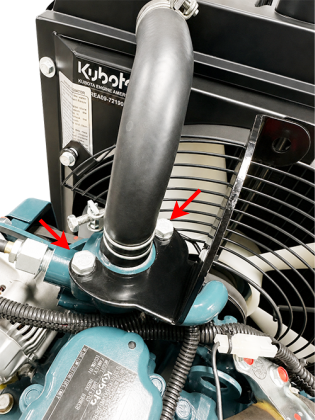
Attach one end of the vibration bobbin onto the stabilizer bracket and the other end onto the radiator fan housing, tightening each nut with an 11 mm (or 7/16 in) wrench.
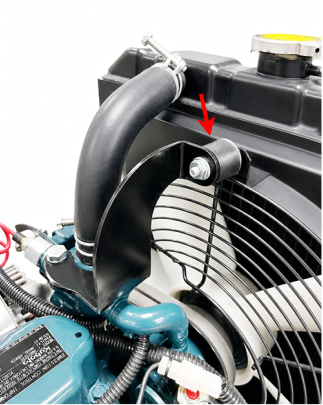
The image below shows the completed installation.