Manual Feed Controller
The Manual Feed Controller is a backup device for use when the primary Feed Controller is non-functional. It allows the operator to start, stop and manually adjust the rotary valve speed.
This manual provides instructions for the installation and operation of the Manual Feed Controller.
Installation
Steps to Install the Manual Controller
Locate the cable connected to the primary Feed Controller.
Disconnect the cable from the primary Feed Controller.
Push up the locking collar on the cable.
Turn the locking collar counterclockwise to unlock.
Connect the cable to the port on the underside of the Backup Controller.
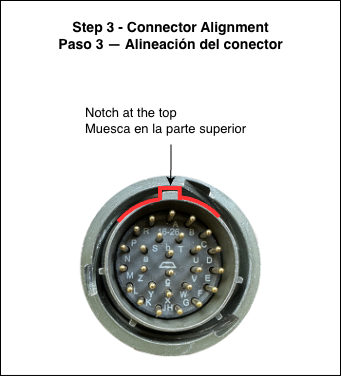
Align the notch on the connector to the top position.
Push the connector in firmly.
Turn the locking collar clockwise to lock.
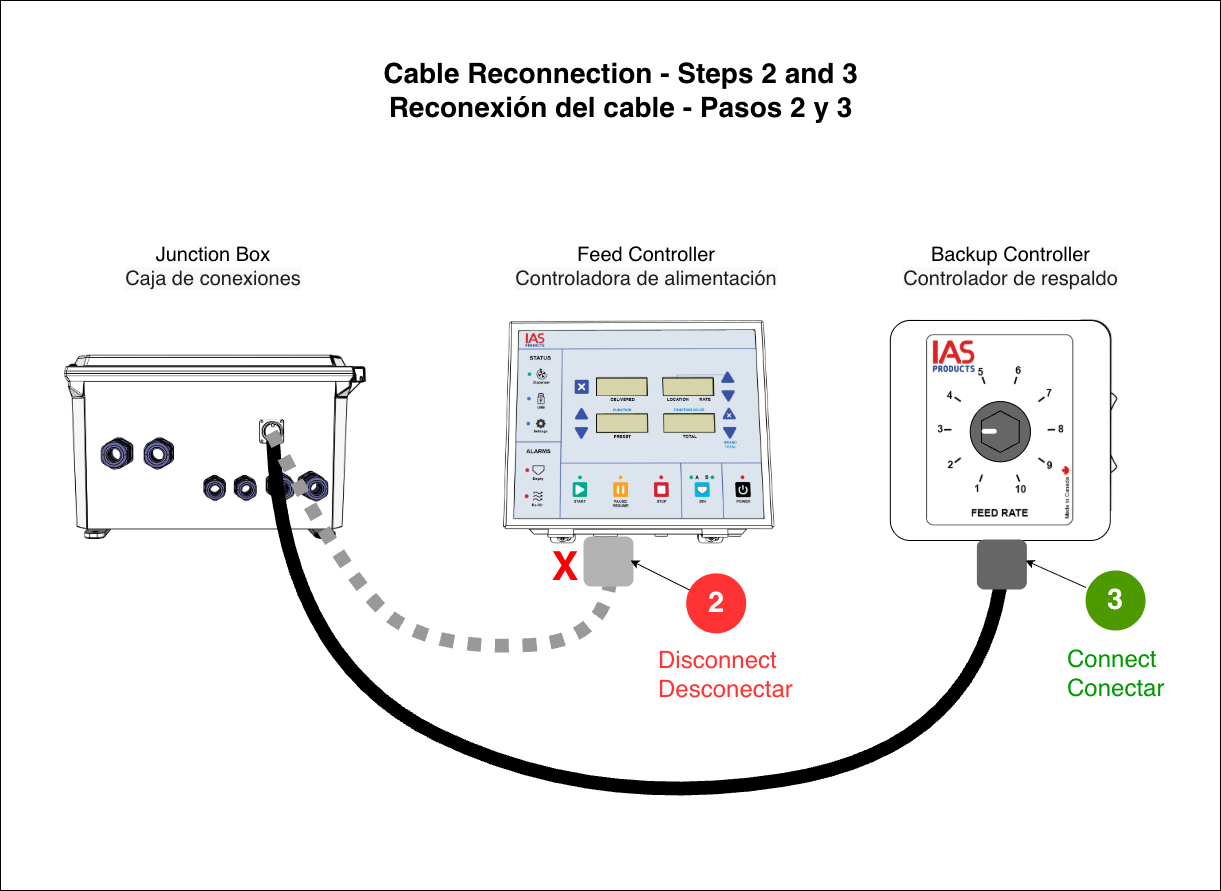
Verify the cable is securely connected.
Operation
Once installed, the Manual Feed Controller is ready to use.
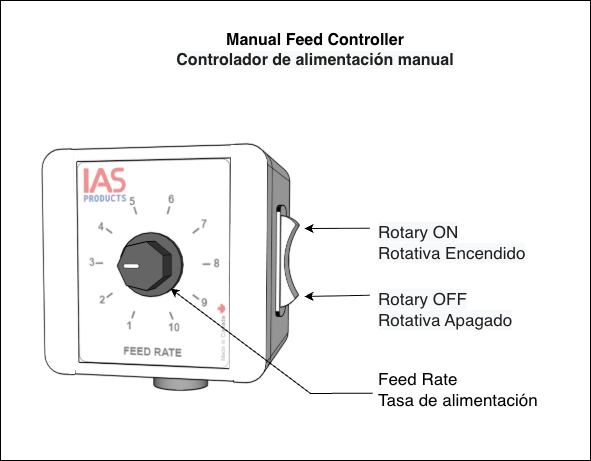
Starting and Stopping the Rotary Valve
The manual controller gives you the simpliest way to control feed flow and feed rates
Set the Feed Rate knob to the same position as on the primary Feed Controller. - Position 1 is minimum feed rate. - Position 10 is maximum feed rate.
To start the rotary valve, press the power switch to ON. The red light on the switch will turn on indicating power to the rotary valve.
Adjust the feed rate knob as needed.
To stop the rotary valve, press the power switch to OFF. The red light on the switch will turn off.
Switching Back to Primary Feed Controller
Steps to Connect to the Primary Feed Controller
When the primary Feed Controller has been replaced or is functional, follow the steps below to reconnect it.
Disconnect the cable from the Backup Controller. Refer to instruction to remove the cable.
Connect the cable to the primary Feed Controller.
Ensure the cable collar is locked in place.